

DUCT TAPE DUMMY TUTORIAL
A duct tape dummy (DTD) is a life-sized replica of your body made using duct tape. It helps fursuit makers get precise measurements for a perfect fit. This guide will walk you through every step to ensure your DTD is strong, accurate, and ready to be used. Take your time, follow each step carefully, and most importantly—have fun with the process!
SUPPLIES YOU WILL NEED
Before starting, gather everything you'll need so the process goes smoothly. Here's what you'll need:
A disposable painter's suit (These can be found in the paint section of most hardware stores. It's best to get a size larger than what you normally wear so that it fully covers your wrists and ankles.)
3-5 big rolls of duct tape (High-quality silver duct tape is recommended for strength and durability.)
A good pair of scissors (Safety or medical scissors with rounded tips are best to avoid accidents.)
A marker (You'll use this to mark where to cut.)
A friend or two to help (Taping yourself is nearly impossible, so have a helper.)
Plastic bags or paper towels (To protect exposed skin.)
Disposable gloves (Optional, but useful if you're taping over your hands.)

BEFORE YOU BEGIN: IMPORTANT REMINDERS
It's super important to keep these things in mind, as they will directly affect the quality of your fursuit:
Always use strong, high-quality duct tape so your DTD doesn’t fall apart.
Apply multiple layers of tape to ensure the dummy holds its shape.
Make sure to tape your feet and wrists properly.
When you’re done, tape the DTD back together before sending it.
Your DTD should not be falling apart, too thin, or missing coverage in key areas like the armpits, crotch, and shoulders.
STEP ONE: PREPARE YOURSELF
Before you even start taping, take a few precautions to make sure you stay safe and comfortable.
Eat a balanced meal and drink plenty of water. You will sweat since duct tape is not breathable, so keep some water nearby.
Wear old clothes. There’s a chance they might accidentally get cut when removing the dummy.
Take a quick shower.
Wear slippers or cushioned shoes. Standing for a long time on a hard floor can get exhausting and painful.
Never lock your knees. Keeping them slightly bent will prevent fainting.
STEP TWO: START TAPING FROM THE MIDDLE
Put on your painter’s suit and make sure it fits comfortably. To keep the suit from shifting around while taping, start by securing the middle of your body first.
Begin taping around your chest and crotch in a harness-like fashion. This will keep the suit in place as you continue taping outward.
Avoid starting at the ankles and working your way up. As the tape builds up, the weight can cause the suit to sag, which can lead to incorrect proportions—especially shorter legs!
Throughout the taping process, make sure to apply multiple layers of tape for extra strength and durability.
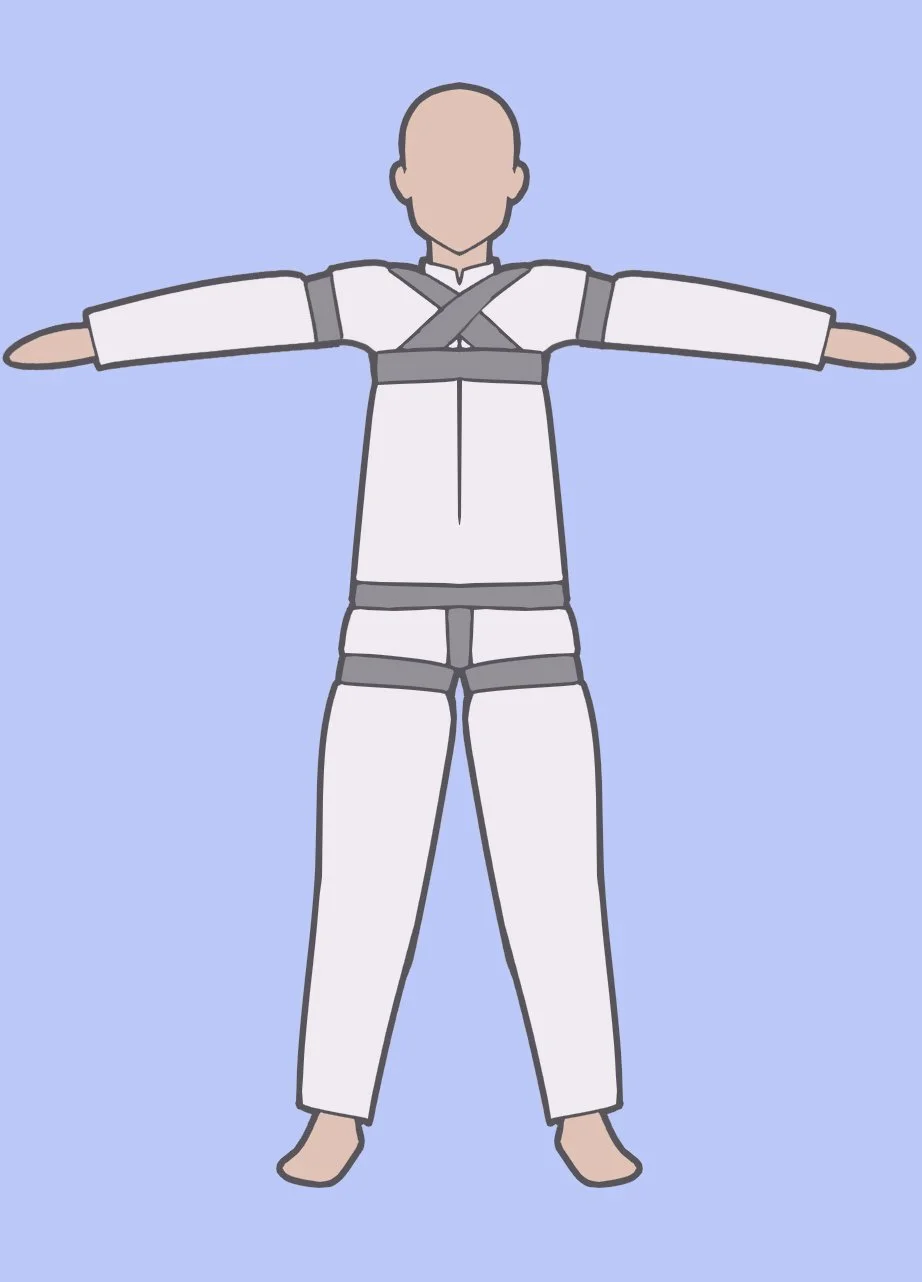
STEP THREE: TAPING THE TORSO
Now that your suit is secure, you can start covering your torso.
Instead of wrapping the tape directly from the roll onto your body, cut or tear the duct tape into strips (about 10-20 cm long) and apply them piece by piece.
Stick the tape down in a crisscross pattern rather than straight lines. This strengthens the dummy and prevents weak points that could rip later.
Keep your posture straight while taping! Slouching can make the front of your suit too short and it will be hard to stand properly.
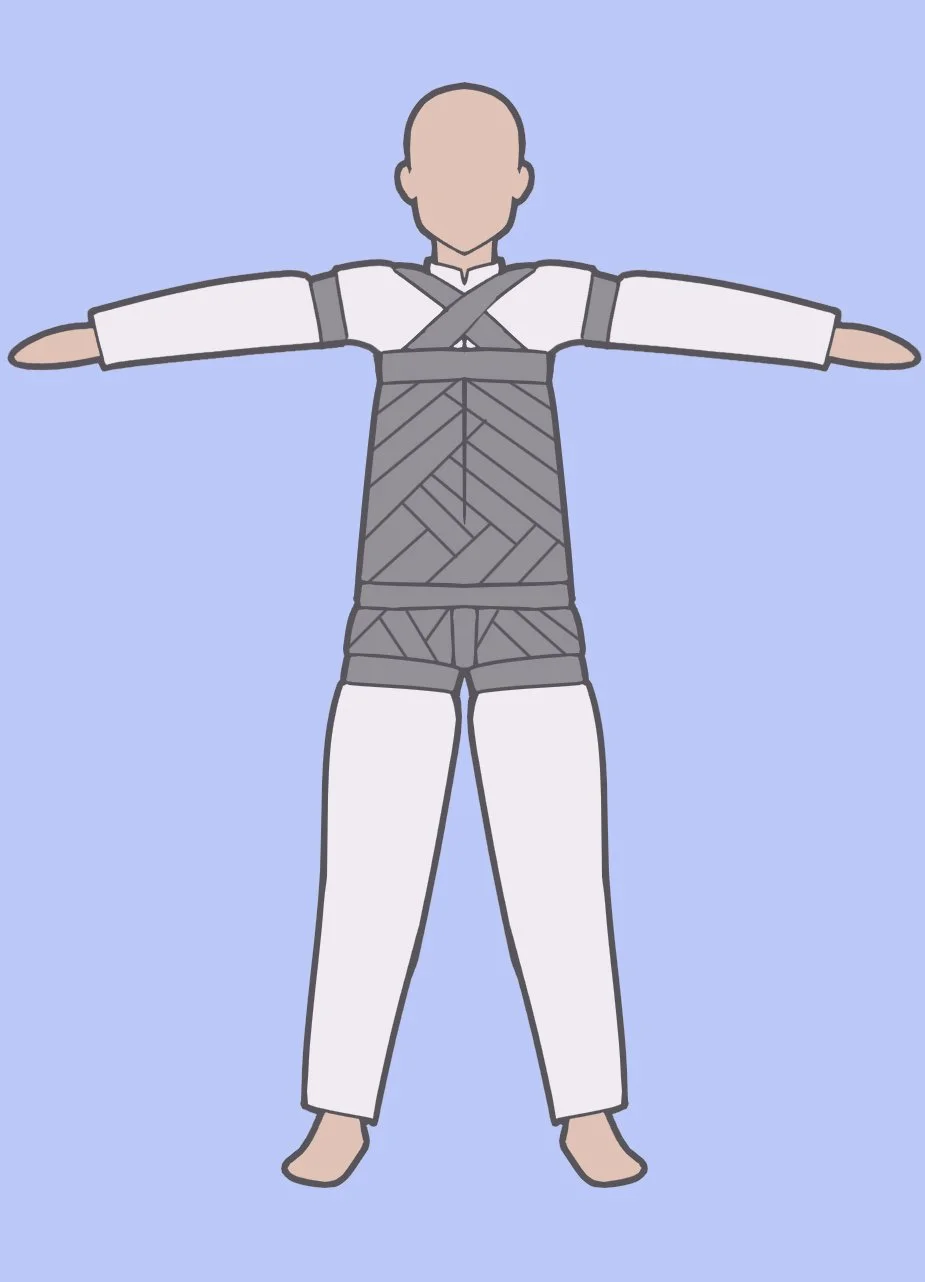
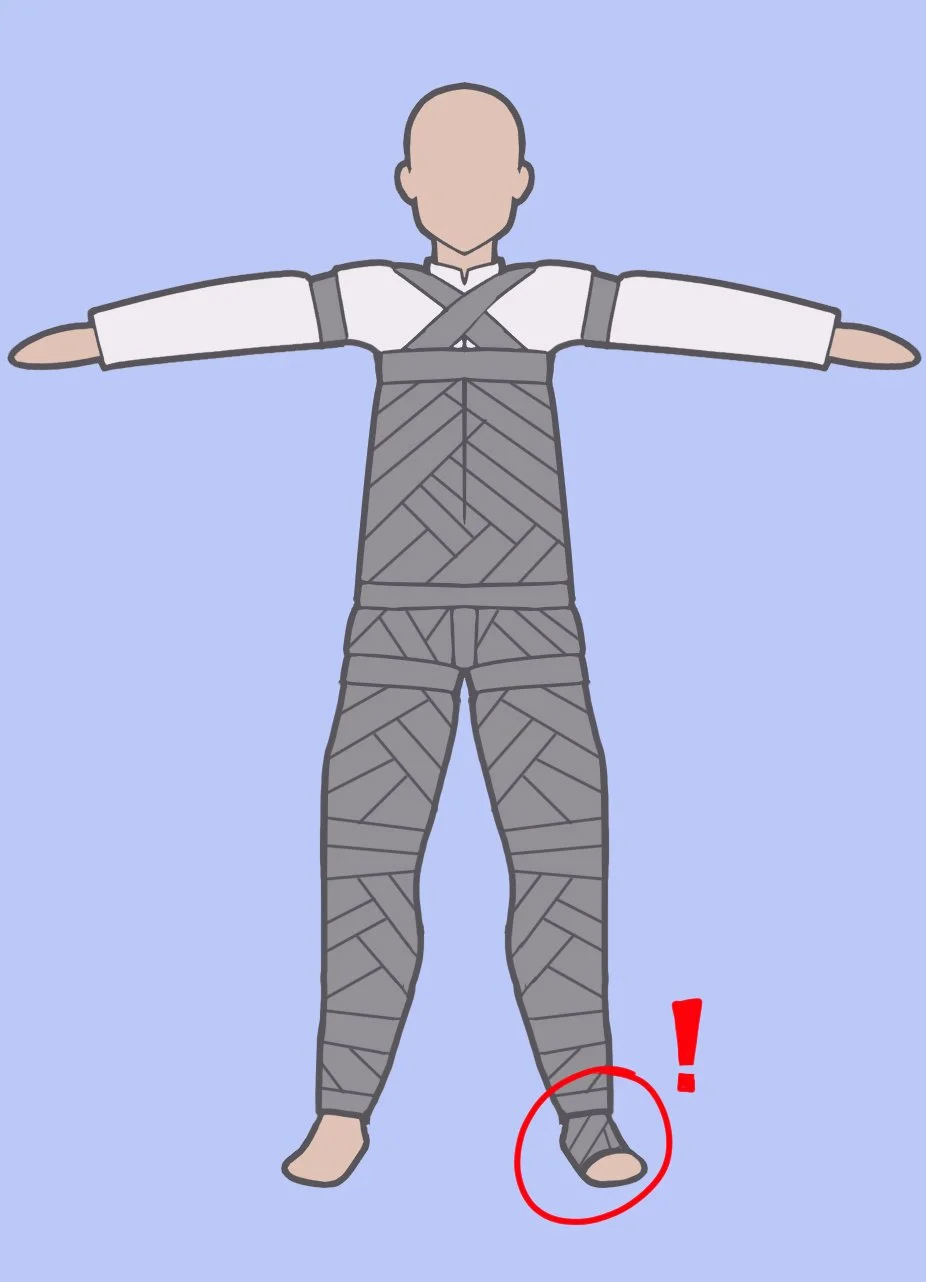
STEP FOUR: TAPING YOUR LEGS AND FEET
When it’s time to tape your legs, spread them slightly apart but keep a comfortable stance.
Keep your legs straight but not locked to avoid strain.
Once you reach the ankles, grab a plastic bag and place it over your foot. Tape around the heel and ankle to get an accurate height measurement. You only need to do half the foot.
If your painter’s suit is too short and doesn’t reach your ankles, you can use paper towels or plastic bags to bridge the gap. Just make sure the tape never touches your bare skin!
If you prefer, you can wear an old sock when wrapping the foot for extra protection.
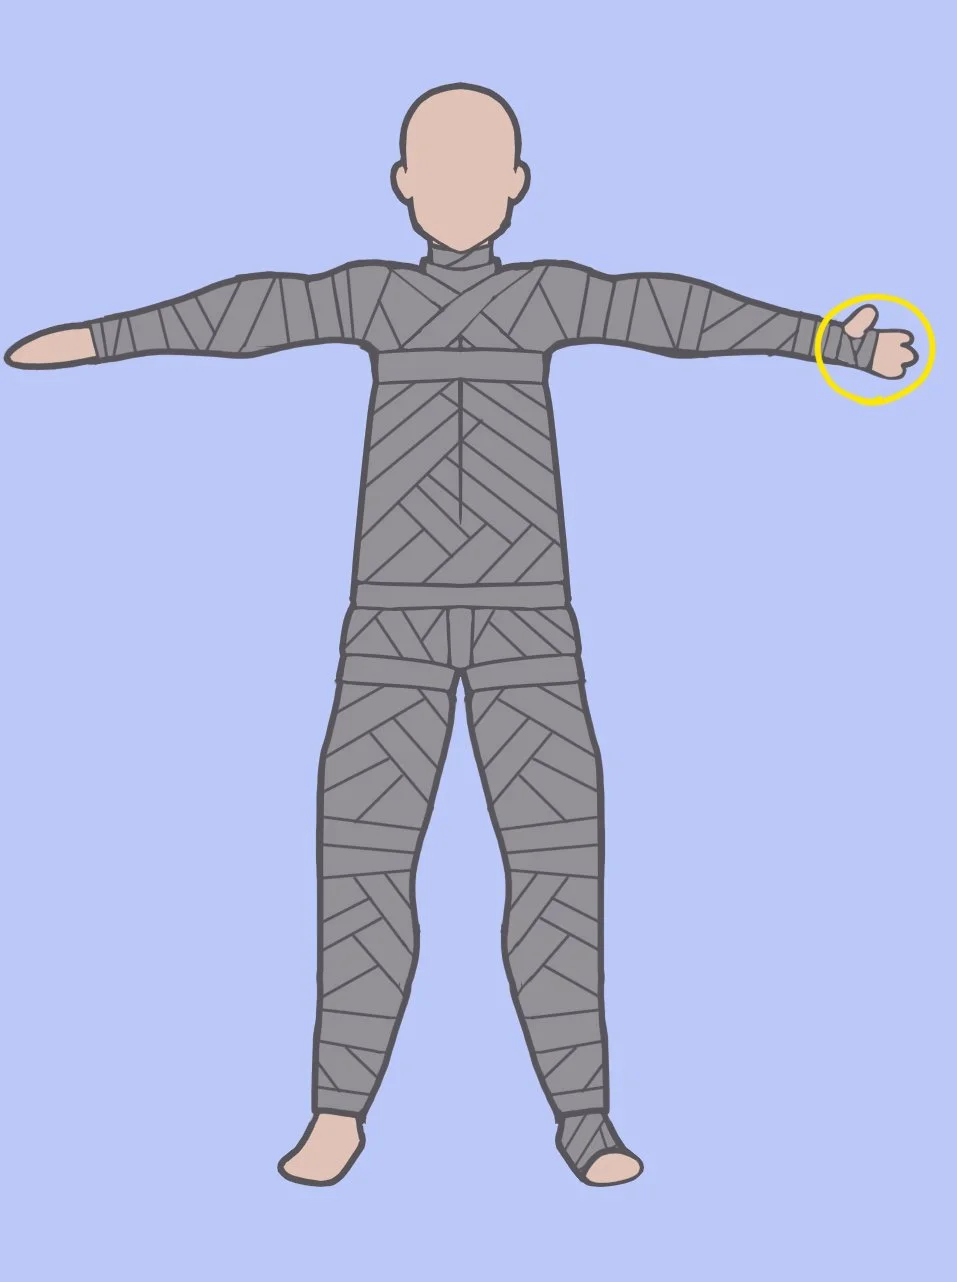
STEP FIVE: TAPING YOUR ARMS
Once your legs are done, it’s time to work on the arms.
Raise your arms into a T-pose and keep your shoulders back. Don’t slouch but don’t strain!
Holding your arms up for too long can be tiring, so rest them on a chair, a wall, or another surface when needed.
Be extra careful when taping around the armpits and shoulders. If this area is too tight, it will make arm movement difficult in the final suit.
Tape slightly past your wrist.
Optional: If you want a better fit, wear a disposable glove and tape around your hand, creating a mitten-like shape. There’s no need to tape individual fingers.
STEP SIX: TAPING YOUR NECK (OPTIONAL)
Taping the neck is optional, but it can help with better fitting a zipper and bodysuit neck.
If you do this step, wrap your neck loosely with a plastic bag or paper towel before applying the tape.
Be very careful in this area—YOU STILL NEED TO BREATHE!
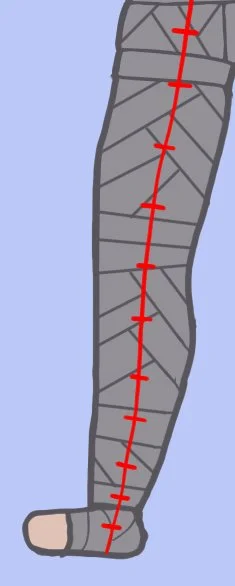
STEP Seven: MARKING THE CUT LINES
Once the taping is done, it’s time to mark where you’ll cut.
Use a marker to draw clear cut lines.
Add small guide lines along the seams so that you can easily align and tape the dummy back together after cutting.

STEP EIGHT: CUTTING OFF THE DTD
It’s time to carefully cut yourself out of the dummy.
Start by cutting up one shoulder, past the neck, and down the arm.
Next, cut down the center of the torso to free your upper body.
Finally, cut from the foot up to the knee. Once past the knees, you should be able to carefully wiggle out without cutting too much more.
Use safety scissors with a rounded tip to avoid cutting your skin or clothes.
STEP NINE: TAPING THE DUMMY BACK TOGETHER and shipping
Once you’re free, it’s time to reassemble the dummy.
Use the guide marks you drew earlier to help align the pieces.
Carefully tape the DTD back together so it holds its shape.
Fold up your finished DTD and place it into a small box. It’s fine to squish it down!
Ship it off